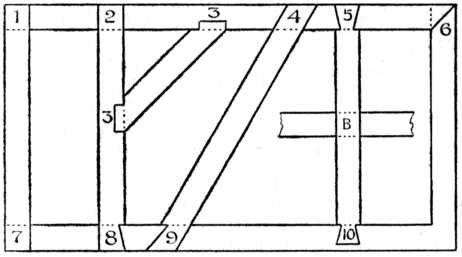
This is a diagram of different joint types.
- Halving joint.
- Halved T joint.
- Angled half lap.
- Angled halving joint.
- Dove tail.
- Mitre halving joint.
- Halved joint with double dovetail.
- Half dove tail.
- Oblique dovetail halving joint.
- Stopped dovetail joint.
 Halving Joints: This a halving joint, First step is to mark it out, then you cut the half the side down to TW(timber width). Next you cut the top down to the saw mark which you already made. Then that part you made is the top part. Then you do this process again to the other piece.


- Dovetail joint: this is a dovetail joint, First step is mark it out, Then you cut the half of the TD (timber depth). Once you have done that you have to get a chisel to make a mark for the saw to cut the angle for the dovetail. Next the other piece you have to mark it out with the piece you made, Then you cut the angled lines first then you cut 5mms after the angled cut.Then you chisel the rest off then the picecs should fit.

Images from The Project Guttenberg eBook of Woodwork Joints.
ReplyDelete